We will talk about the PowerPoint tool today that will save you and your colleagues plenty of time. Using a template is what you should do if you want to keep the PowerPoint presentations from your company consistent.
Whether you are familiar with templates or not, we will teach you everything you need to know and walk you through the process of making your own.
What is a PowerPoint template?
A PowerPoint template is a pre-designed framework that guides the overall look and feel of a presentation. It serves as a blueprint for the style and format of the slides, allowing users to focus more on the content outline rather than the design details. Templates usually come with a predefined layout, which includes a set of slide designs, color combinations, fonts, and sometimes smart art items. These elements are customizable, giving users the flexibility to tailor the template to their specific needs.
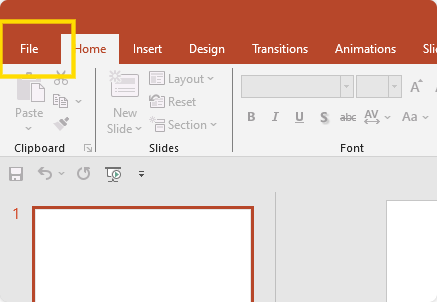
When creating a fresh presentation, users can select a template from the File Tab under the default option, or they may choose to import templates from online sources. The template includes various built-in slide layouts, like a cover slide, content slides, and a default slide master that ensures consistency in design across all slides.
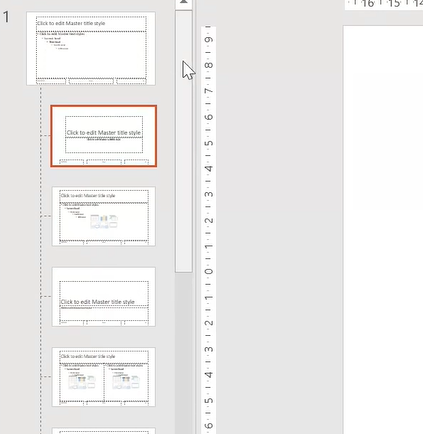
Users can view these different layouts in the Slide Thumbnail Pane, and select them based on the content's requirements.
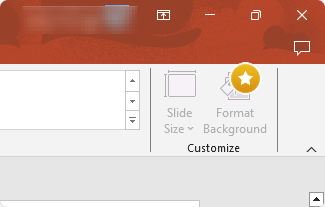
PowerPoint templates often feature tools like a search bar for finding specific templates or content within a slide, and the ClickSlide Size option to adjust the larger slide image dimensions. The Slide Master lets users customize the default layouts and add new ones, ensuring that each slide in the presentation reflects the desired appearance.
By using a PowerPoint template, the process of creating visually appealing and cohesive presentations becomes significantly easier and more efficient.
You can also read about creating Google Docs templates.
How to create a PowerPoint Template?
Step 1: Start a New Presentation
- Go to File > New > Blank Presentation.
Step 2: Set Slide Size and Orientation
- Navigate to the Design tab.
- Click Slide Size > Custom Slide Size.
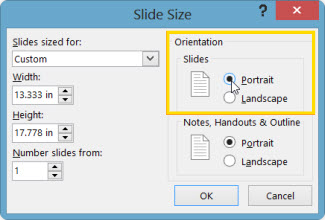
- Choose your preferred orientation (Portrait or Landscape) and dimensions.
Step 3: Access the Slide Master
- Open the View tab.
- In the Master Views group, select Slide Master
- The slide master appears as the largest slide image at the top of the slide thumbnail list on the left.
Step 4: Customize the Slide Master
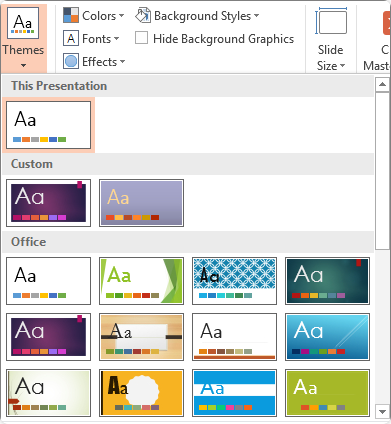
- To add a theme: Click Themes on the Slide Master tab and select from the gallery.
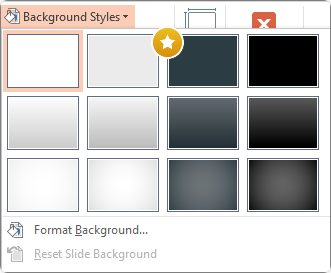
- To change the background: Select Background Styles and choose an option.
Step 5: Adding Placeholders
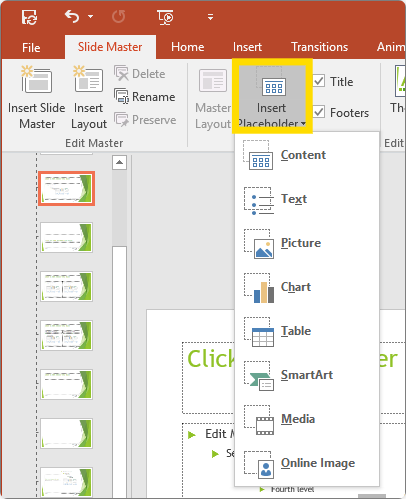
- In the sidebar where thumbnails of slides are displayed, select the slide layout where you want to add the placeholder. Select the desired placeholder.
- Draw the placeholder by clicking and dragging.
- To resize, drag the corners; to move, drag the edges.
- To delete an unwanted placeholder from a slide master or layout, select it in the thumbnail pane, then click its border on the slide and press the Delete key.
Step 6: Adjust Page Orientation (Optional)
- Choose Slide Size > Custom Slide Size.
- Under Orientation, select Portrait or Landscape.
Step 7: Save as PowerPoint Template
- Go to File > Save As (or Save a Copy for Microsoft 365 users).
- In the dialog box, select PowerPoint Template from the Save as type list.
- PowerPoint will automatically suggest the Custom Office Templates folder. Enter a file name for your template, or keep the suggested name.
- Click Save.

Step 8: Using Your Template for New Presentations
- To create a new presentation with your template, go to File > New.
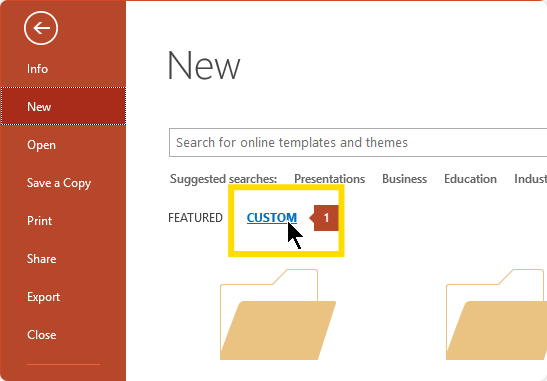
- Click Custom > Custom Office Templates.
- Double-click your saved template to use it.
You can also check our resume resource on How to Create a PDF Logo.
How to Create a PDF PowerPoint on Windows
Looking to convert your presentation from a PDF file to a PowerPoint format? Here's a step-by-step guide for Windows users:
Step 1: Create or Open PDF Content
Begin by either creating a new PDF document by selecting the "Create PDF" option, or get ready to open an existing PDF that you wish to convert.

Step 2: Select "PDF to PPT" from Advanced Tools
From within the application, go to the Advanced Tools section and select the "PDF to PPT" option. Navigate through your file manager to find your presentation, then click "Open" to proceed.

Step 3: Adding Multiple Files (Optional)
If you need to convert several files at once, you can use the "Add Files" function. This allows for batch conversion, saving time when dealing with multiple documents.
Step 4: Saving the Converted PowerPoint File
After your PDF is ready for conversion, simply click on the "Convert" button. This action will transform your PDF into a PowerPoint presentation and save it in your library for easy access.
How to Create a PDF PowerPoint on Mac
You can quickly convert PDF documents to a PowerPoint presentation on your Mac computer:

Step 1: Starting with PDF Creation
Begin by creating your PDF. If you don't already have a presentation in PDF format, open PDF Reader Pro and click on "Create PDF" on the Home interface. You have the option to create your PDF from images (ideal if you have slides in image format) or from a blank page if you need to start from scratch.

Step 2: Editing Your PDF (Optional)
If you're starting with a blank page or need to make adjustments to your PDF, click on "Edit PDF". This lets you add text and images, essentially designing your slides directly within the PDF.

Step 3: Preparing to Convert: Opening Your PDF Content
Once your PDF content is ready, whether freshly created or pre-existing, open it in the reader. Then, navigate to the "Converter" option in the menu to initiate the conversion process.

Step 4: Converting to PowerPoint
In the final step, choose the "To PPT" option. Click on "Convert" to transform your PDF into a PowerPoint (PPT) file, completing the conversion process.
PowerPoint Template: FAQ



 Free Download
  Free Download



 Support Chat