Headers and footers in Microsoft Word documents are commonly used to provide essential information such as page numbers, document titles, and author names.
We'll go through easy-to-follow steps to effectively remove headers and footers from your Word documents, ensuring your content looks polished and professional.
How to Remove Header and Footer in Word: Method 1
Step 1: Go to the Insert Tab:
Open your Word document. Locate and click on the "Insert" tab at the top of the Word window. This tab offers options for adding various elements to your document.

Step 2: Access Headers and Footers:
Look for the "Header & Footer" group within the Insert tab. It usually appears towards the right side of the ribbon. Click on the "Header" or "Footer" dropdown menu, depending on which one you want to remove. This will open a submenu with options related to headers and footers.

Step 3: Remove Header or Footer:
In the submenu, select "Remove Header" or "Remove Footer," depending on what you want to delete.
Word will remove the header or footer from all pages of your document.

How to Remove Header and Footer in Word: Method 2
Step 1: Open Your Document:
Launch Microsoft Word and open the document from which you want to remove the header or footer.

Step 2: Double-click on Header or Footer:
Move your cursor to the top or bottom of the page until you see a dotted line appear.
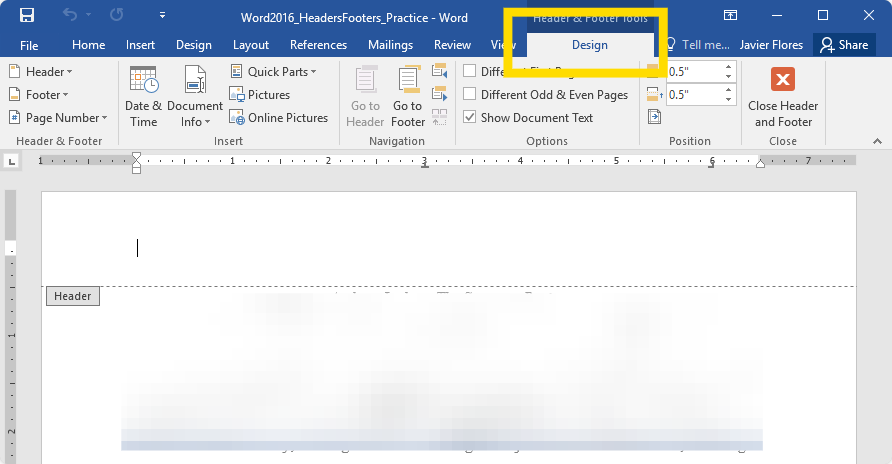
Double-click on the dotted line to enter the header or footer editing mode.
Step 3: Go to Design Tab:
Look at the top of the Word window for the "Design" tab. Click on it to access design-related options for your header and footer.
Step 4: Locate Header/Footer Section:
Within the Design tab, find the section labeled "Header & Footer." It usually contains options for customizing your header and footer.
Step 5: Click Header/Footer Dropdown:
Depending on which one you want to remove, click on the "Header" or "Footer" drop-down button.
Step 6: Choose Remove Option:
After clicking the drop-down, select the "Remove Header" or "Remove Footer" option from the menu that appears.
You can also check out our recommendations on how to create a header and footer in Excel.
How to Convert Word to PDF on Windows
Utilize the integrated conversion tools within PDF Reader Pro to effortlessly generate PDF files from your Word documents on your Windows operating system.
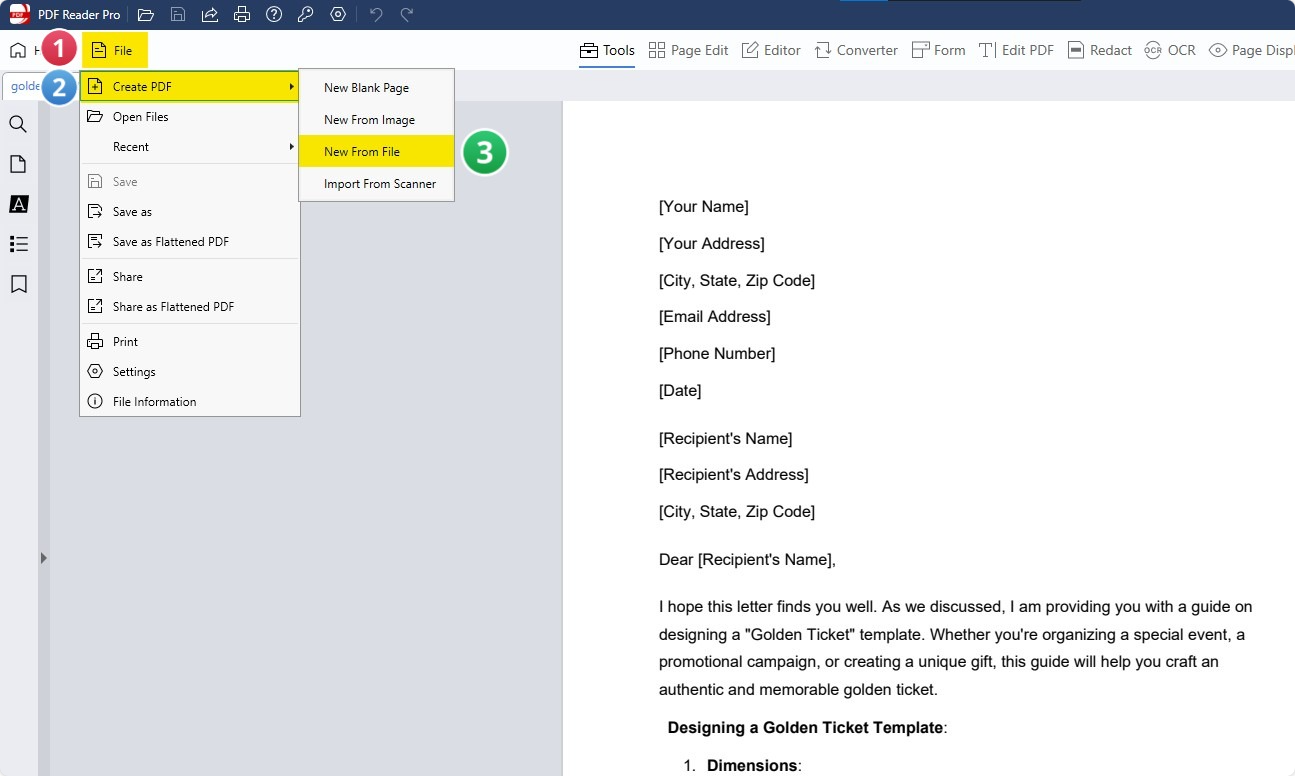
Step 1: Access the File Menu:
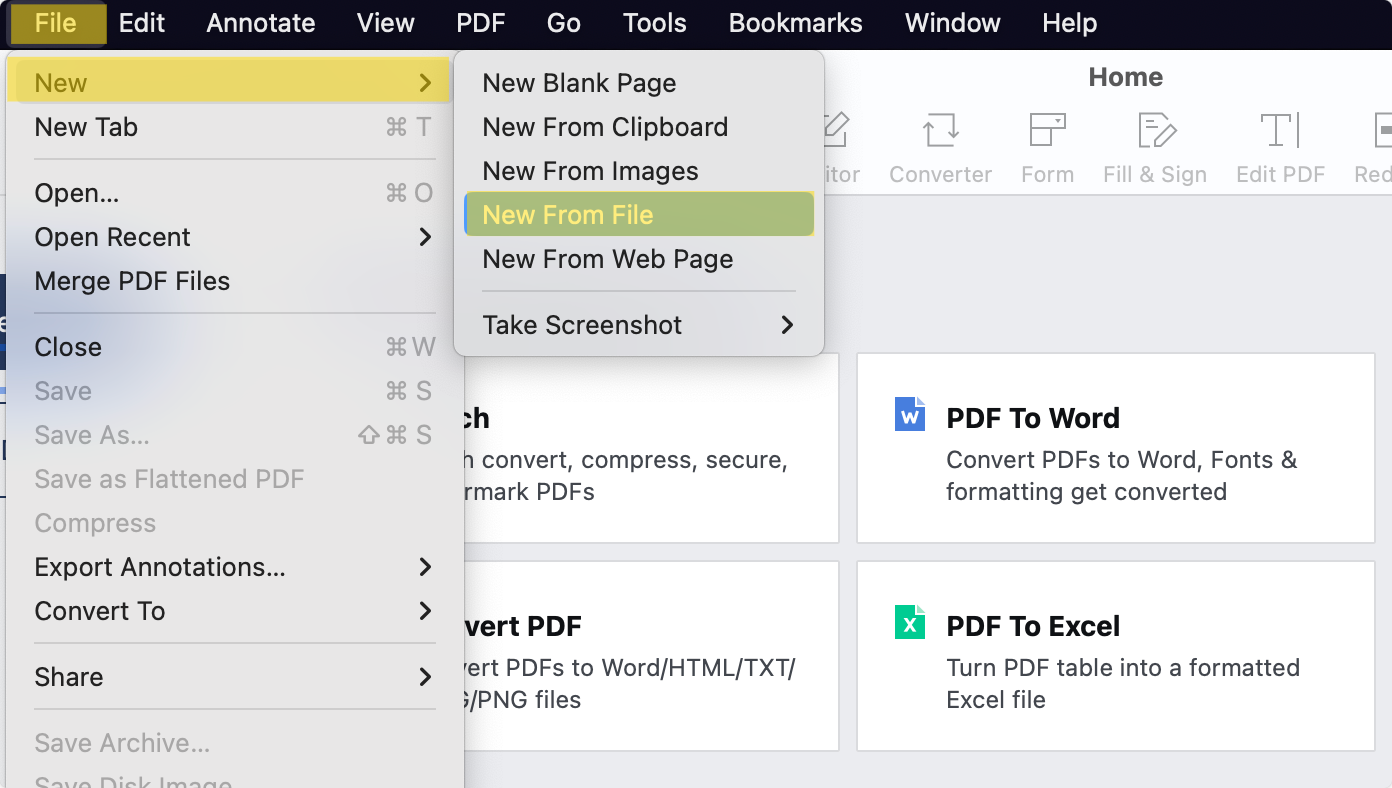
- Click on the "File" button located on the main menu of PDF Reader Pro.
- Choose "New" and then select "From File" from the dropdown menu.
Step 2: Select Your File:
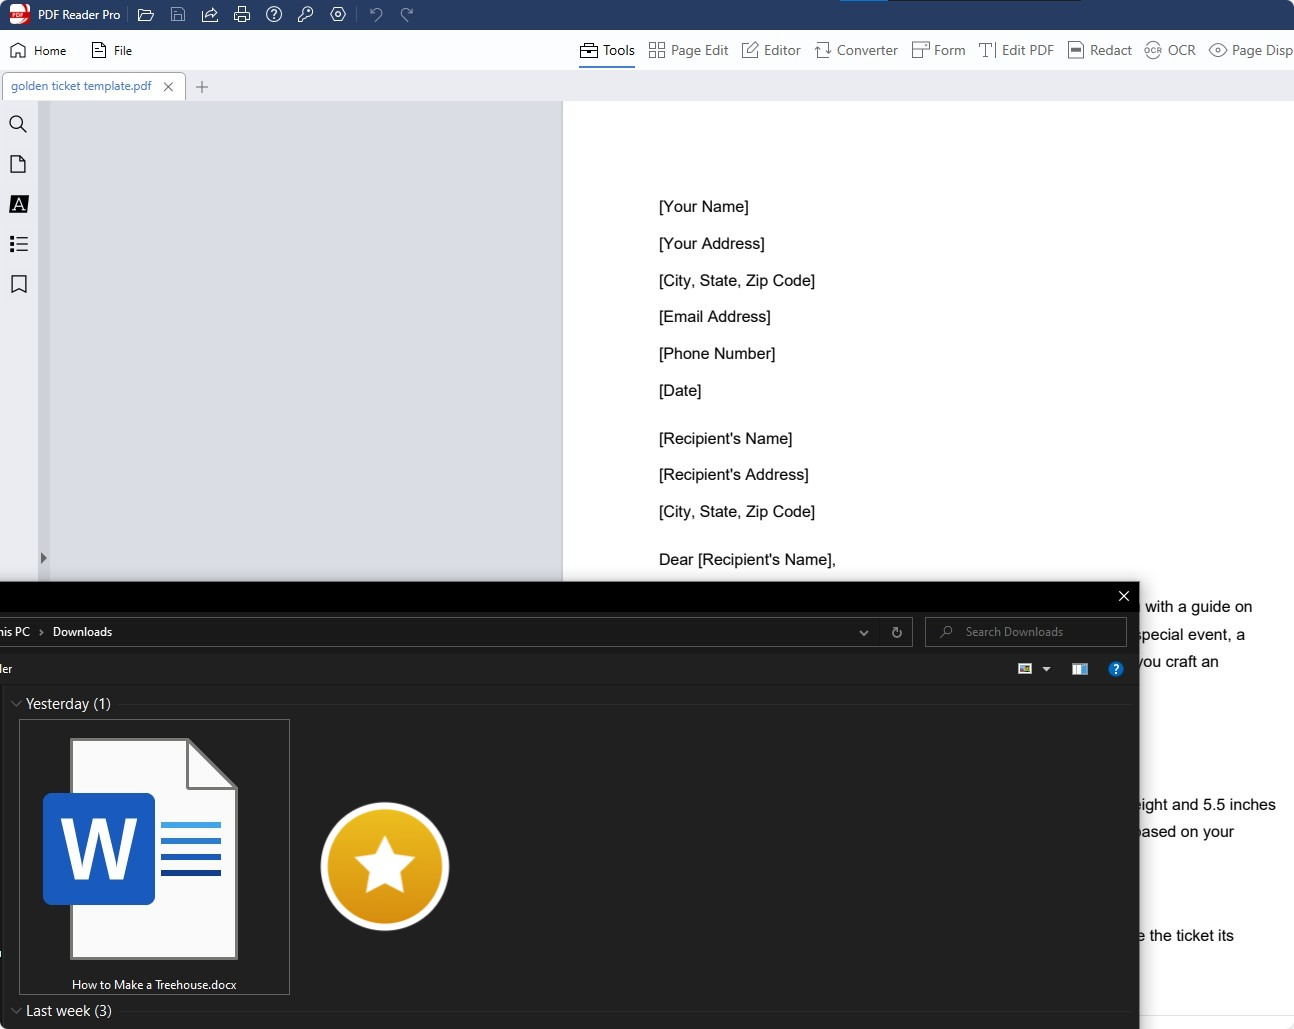
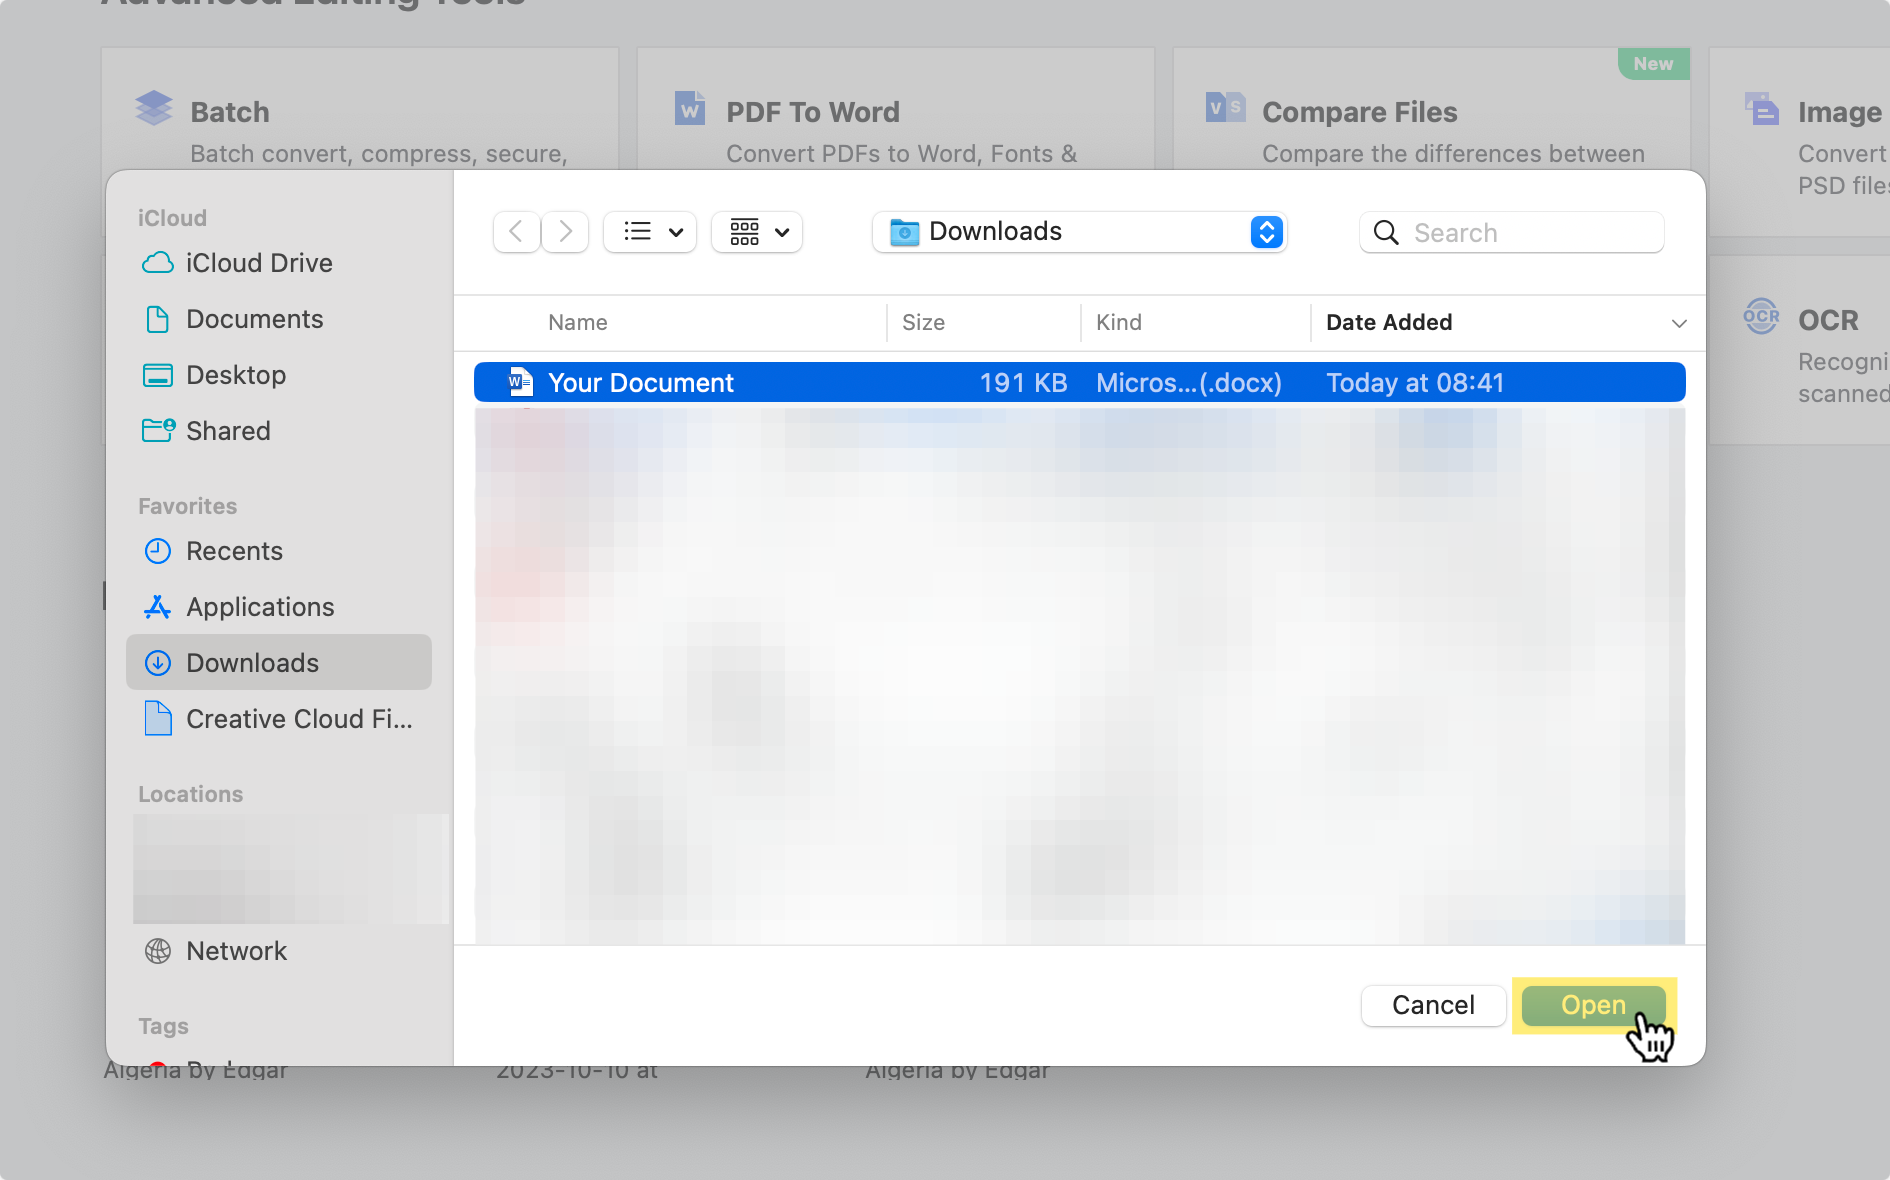
- Navigate to the location of your Microsoft Word file within your file library.
- Choose the Word file you wish to convert to PDF from the available file types.
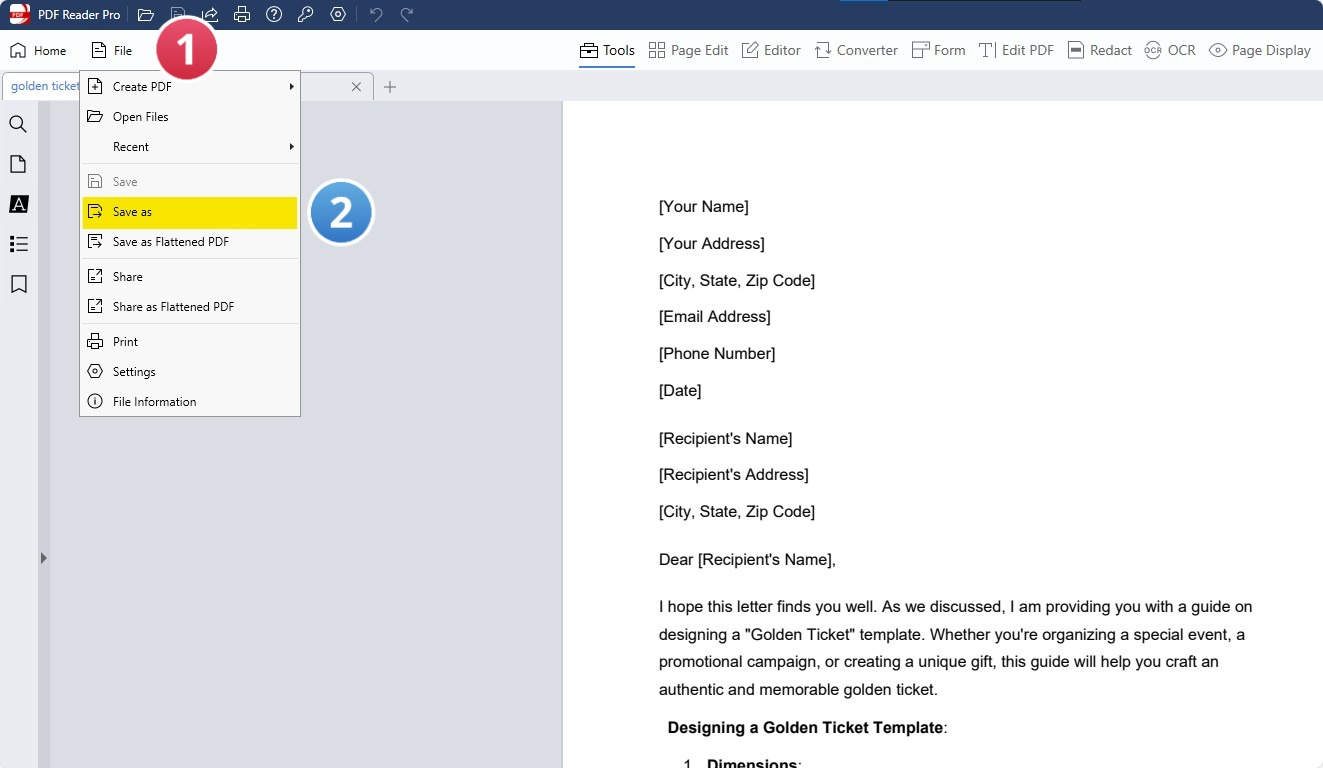
Step 3: Save Your PDF:
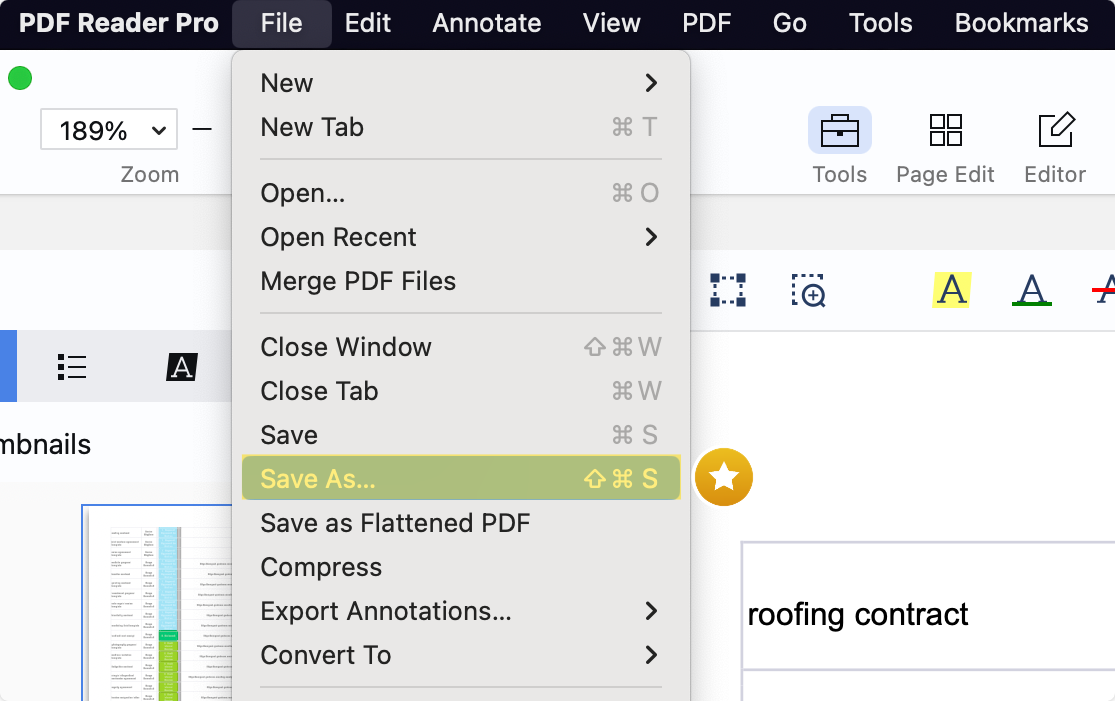
- Once the conversion process is complete, your Word document will be successfully converted to PDF format.
- Save the converted PDF file to your desired location on your Windows system.
How to Convert Word to PDF on Mac
Employ the sophisticated capabilities provided by PDF Reader Pro to seamlessly convert your Microsoft Word documents into PDF files on your Mac operating system.

Step 1: Access the File Menu:
- Click on the "File" button within PDF Reader Pro.
- Select "New" from the dropdown menu, then choose "From File" to access our PDF tools.
Step 2: Locate Your Word File:
- Navigate to the location of your Microsoft Word document on your Mac.
- Select the Word file you wish to convert, initiating the file upload process into PDF Reader Pro.
Step 3: Save Your PDF:
- Upon completion of the conversion process, your Word document will be successfully transformed into a PDF file.
- Save the newly created PDF document to your desired location on your Mac.
- Optionally, utilize our sharing feature to email the PDF document directly or as an attachment.



 Free Download
  Free Download



 Support Chat