To add a digital signature to a PDF, you need to obtain a digital ID first, also known as a digital certificate. These certificates are typically issued by a trusted provider called a Certificate Authority (CA). You can also configure your own digital ID with PDF Reader Pro if you like.
1. Go to Digital Sign tab;
2. Drag to draw a signature field for your signature;
3. In the pop-up window, tick Configure New Digital ID -> Continue -> Create a New Digital ID;
Note: If you already have a digital ID stored on your computer, you can select Use a Digital ID from File.
4. Choose the way to store your Digital ID. You can Save to File or Save to Apple Keychain -> Continue;
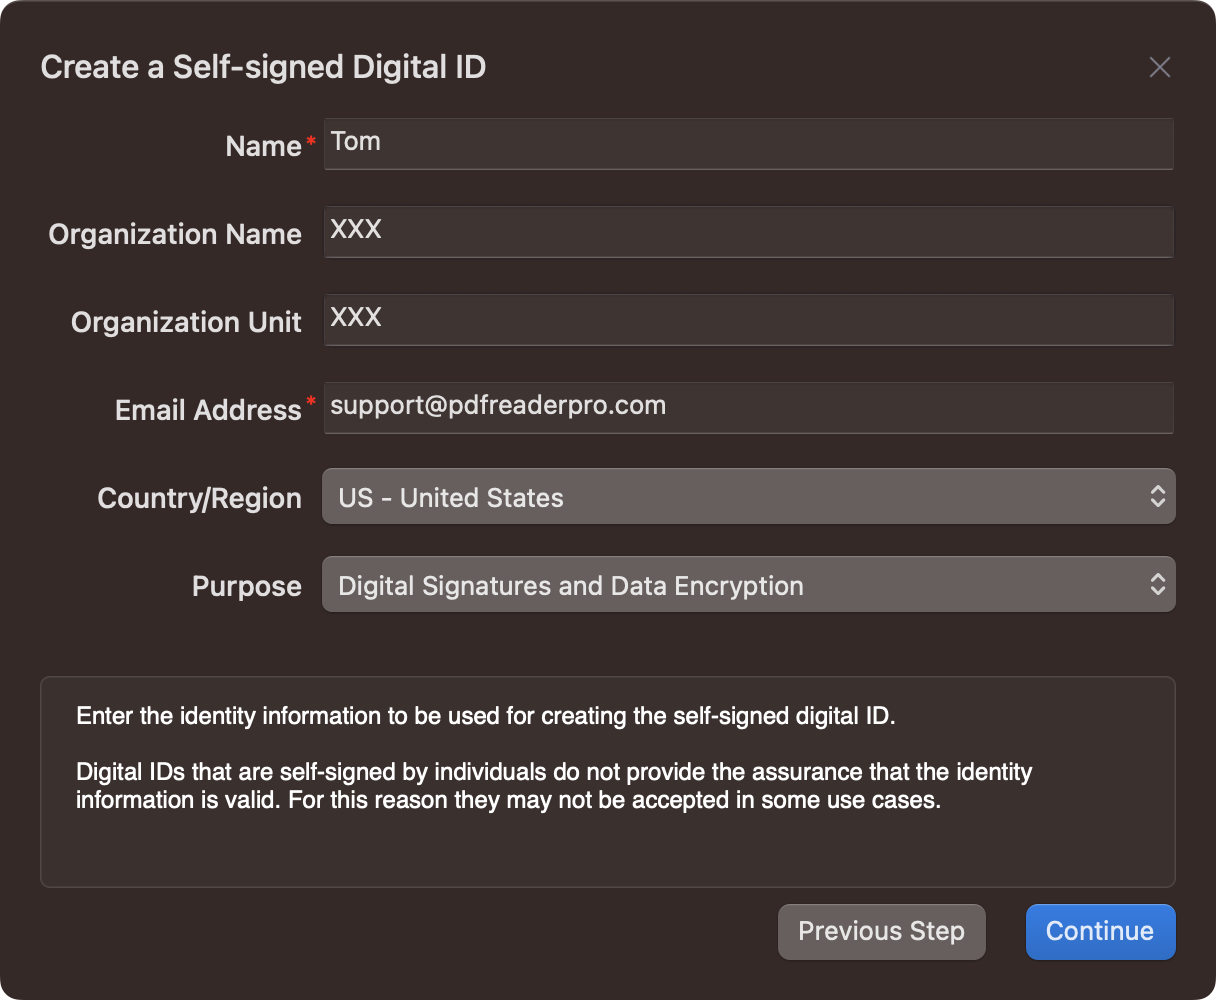
5. Enter your identity information such as name, organization unit, e-mail address, etc. -> Continue;

6. Choose the location to save your digital ID and set the password; (If you choose Save to Apple Keychain in step 4, this step will be skipped)
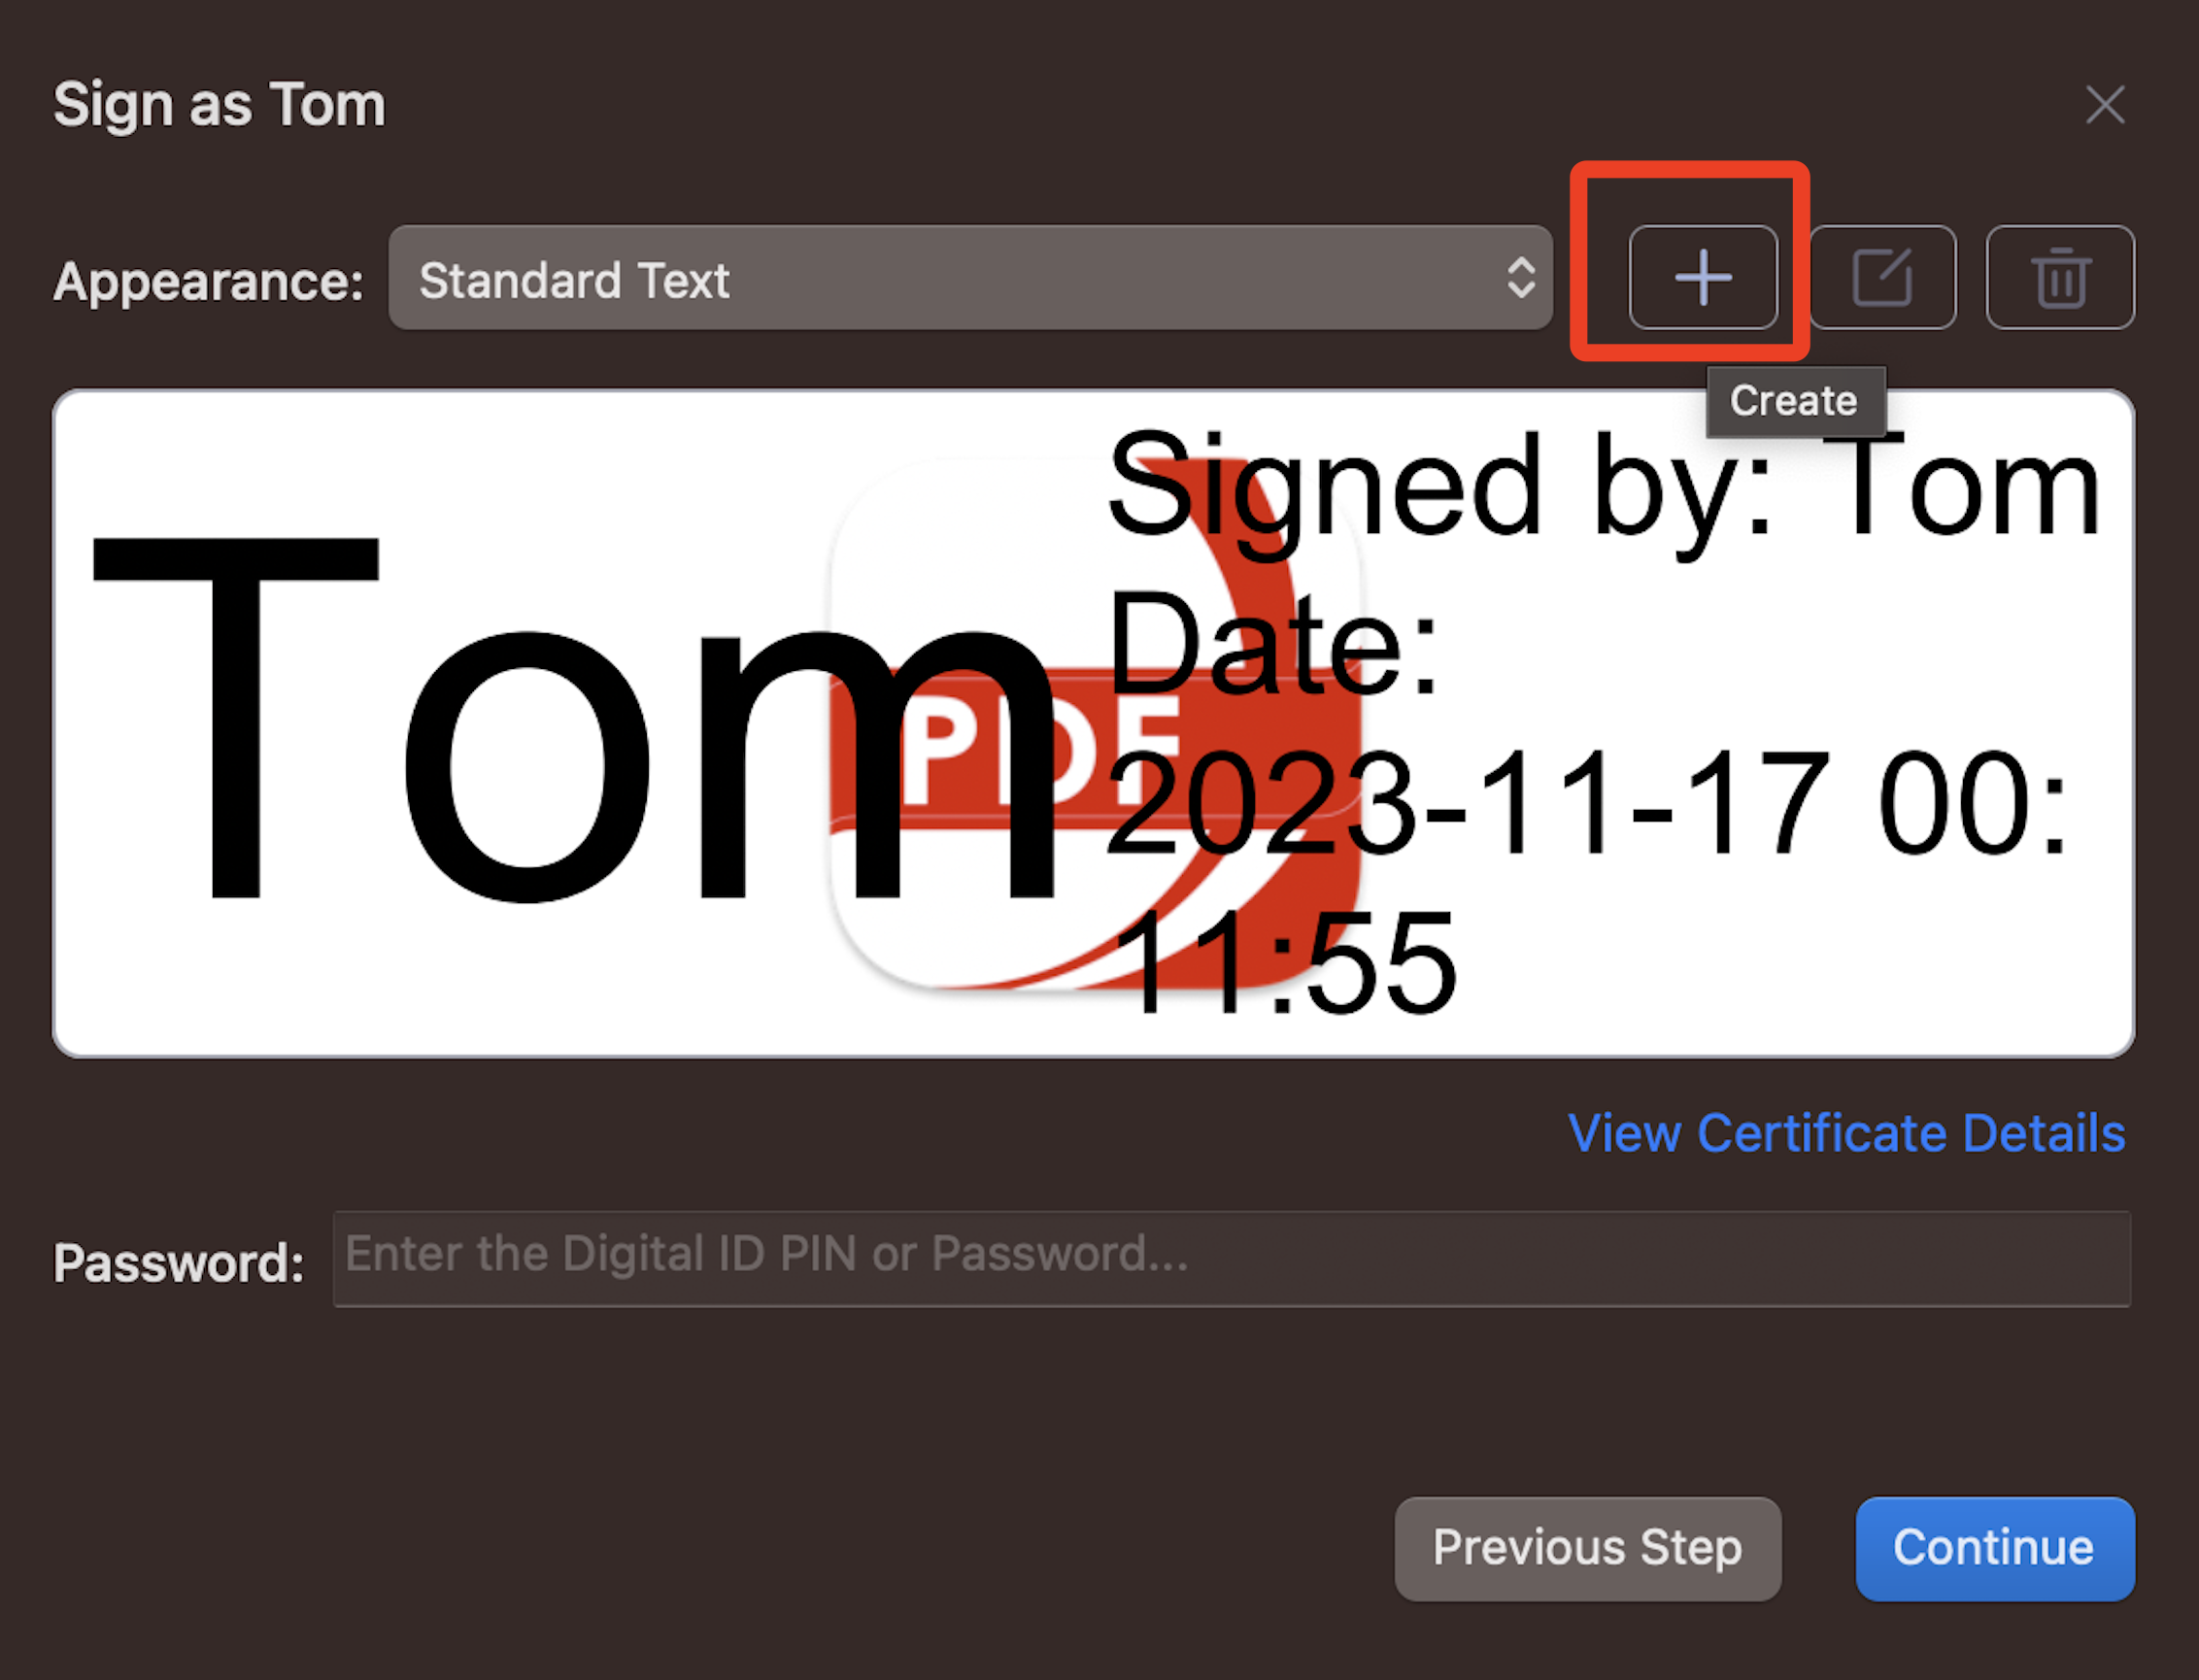
7. Finally, click Continue to apply the digital signature to your document. Also, you can set the appearance of the signature before applying it, for example: the text included in the signature field, the signature style, and more.
Note: To set the appearance of the digital signature, you can click Create in the top right corner of the pop-up window.

Tips: The certificate is actually the authentication of the user's public key issued by the certificate visa authority (CA). The content of the certificate includes: information about the electronic visa authority, information of the public key user, public key, signature of the authority and validity period and so on. At present, the format and validation method of the certificate generally follows the X.509 international standard.
Download PDF Reader Pro Mac for a free trial of digital signature feature!

 Support Chat